The Ladder of Inference shows how we get from something that happened to how we act on it, one rung at a time. At the foot is what anyone could have seen. Each rung up adds a little of our own thinking, until we act on a belief that may have little to do with the facts. Students use it to slow down a quick judgement, such as "Sam didn't say hello, so Sam doesn't like me", and find the rung where an assumption crept in.
Where your data goes
Your ladder is kept in this browser as you work, so it is still there when you come back. Save keeps a copy under a name you choose. Saved copies are included in Backup & Restore, and in sync if you have turned it on. A share link holds the whole ladder, so nothing is uploaded and nobody needs an account. If you clear the browser's data, you lose anything you have not backed up.
Quick start
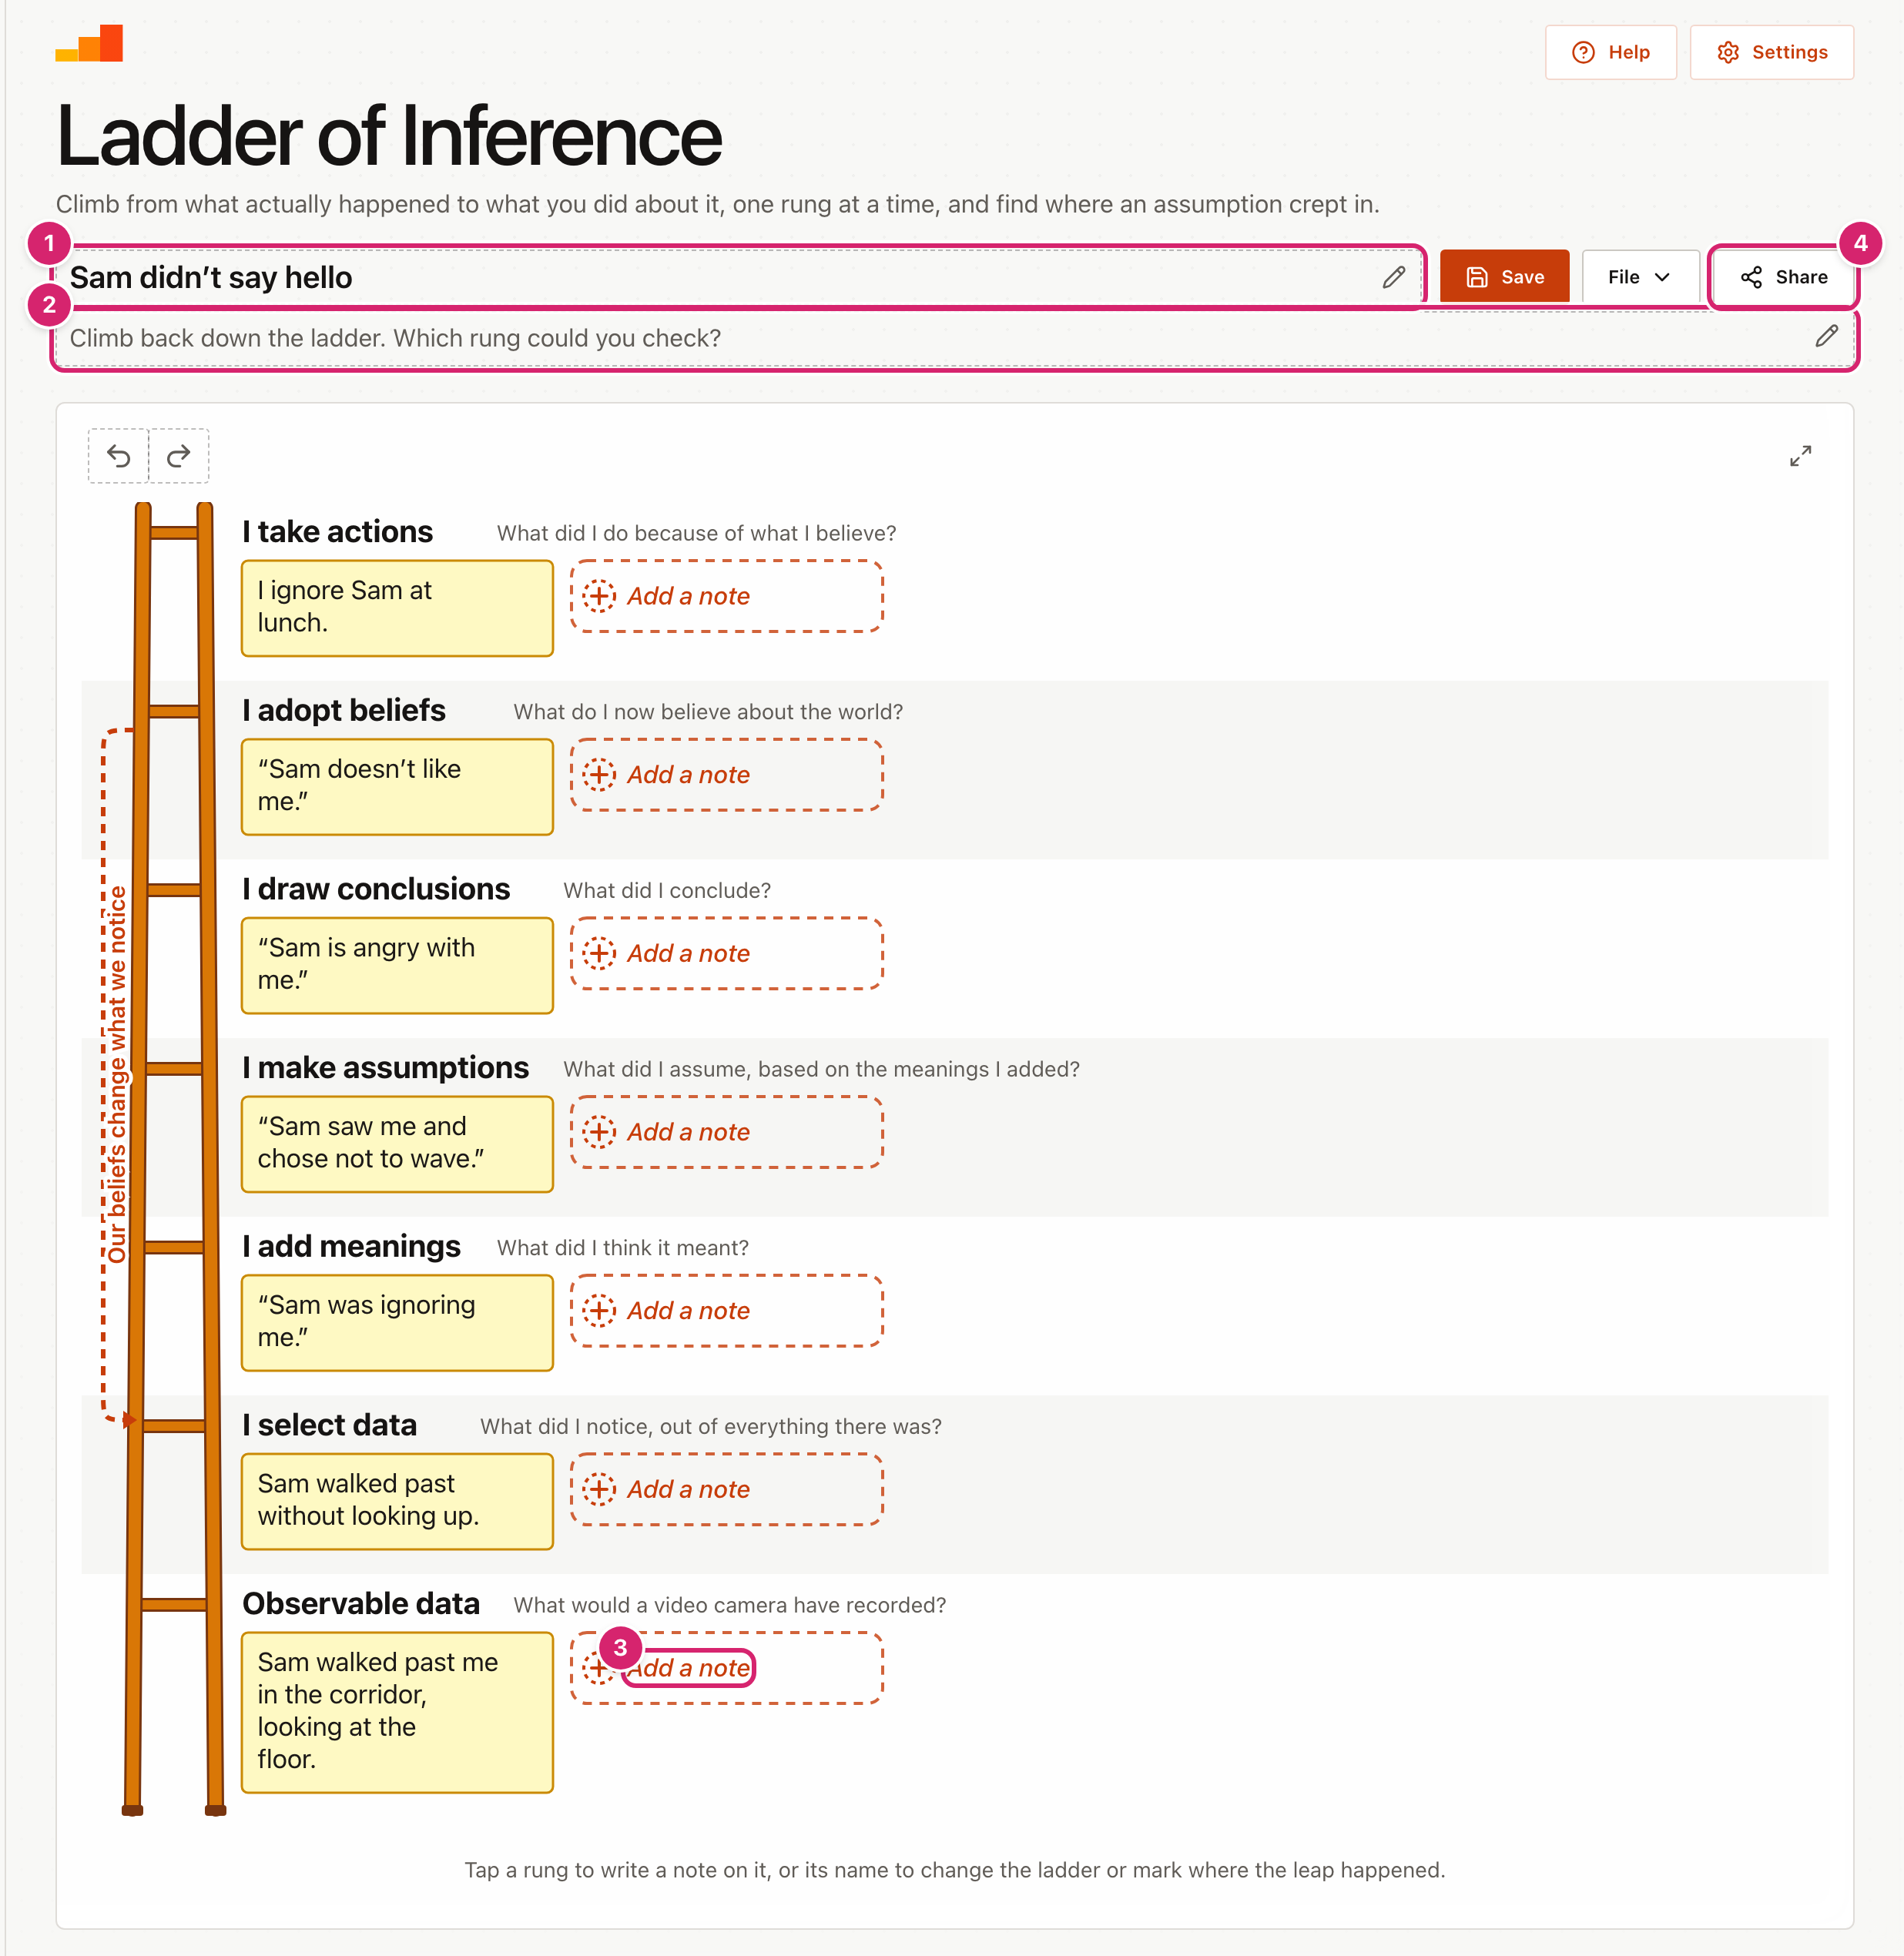
The tool opens on a worked example, "Sam didn't say hello". Read it with the class from the bottom up.
- Open File, select New blank diagram, and confirm.
- Select the title 1 and type the situation.
- Select the line under it 2 and write the question or task for the class.
- Select + Add a note on Observable data 3, at the foot of the ladder, and write what a video camera would have recorded. Press Enter to add it.
- Climb one rung at a time, writing a note on each.
- Select Share 4 to send it to students.
Start from an example
Open File and select Examples for 8 ready-made examples for ages 8 to 18, in tutor time, maths, English, history, science, geography, PE and computing. They run from a maths test covered in red to a 1930s propaganda photograph. Each one shows its age range and its question, and many add a note for teachers, such as the rung most worth checking on the way back down. Select a subject to narrow the list, then Open to use one. It replaces what is on screen, and Undo brings your work back.
Climb the ladder
The rungs, from the foot to the top, each come with a question.
- Observable data: What would a video camera have recorded?
- I select data: What did I notice, out of everything there was?
- I add meanings: What did I think it meant?
- I make assumptions: What did I assume, based on the meanings I added?
- I draw conclusions: What did I conclude?
- I adopt beliefs: What do I now believe about the world?
- I take actions: What did I do because of what I believe?
Start at the foot with facts only. "Sam walked past me in the corridor, looking at the floor" is observable. "Sam ignored me" is already a meaning, so it belongs higher up.
Climb back down
Once the ladder is full, go back down it. At each rung, ask "What else could this mean?" In the example, Sam may have been worried about a test, or not seen anyone at all. The rung where another answer fits is where the assumption crept in.
When you find that rung, select its name and then The leap was here. The rung is outlined and tagged "The leap happened here", so the class can see where the reasoning jumped. Select it again and choose Clear the leap to take the mark off. Students can mark the leap on a starter too, because it is their own thinking.
The dashed arrow down the left side, labelled "Our beliefs change what we notice", is the reflexive loop. The beliefs we adopt change which data we select next time, so we notice what confirms them.
Write and change notes
- After you press Enter, a new note opens on the same rung so you can keep writing. Press Enter on an empty note to stop. A rung holds up to 8 notes.
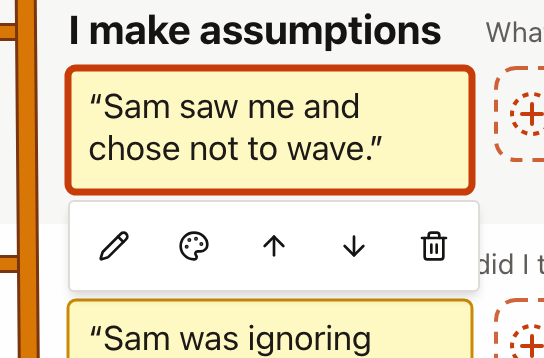
- Select a note to show its toolbar. From left to right the buttons edit the note, colour it, move it up a rung, move it down a rung, and remove it.
- There are six colours, plus none. Use them to group ideas or show who wrote what.
- Once a note has a colour, a key appears under the board. Select What does red mean? (or whichever colour) and type what that colour stands for, such as "My ideas" or "Facts we checked". The key travels with the link and the download, and a starter keeps any meanings you gave.
- Drag a note onto another rung, or to another place on its own rung. The target rung lights up while you drag.
Change the rungs
Select a rung's name to open its toolbar. From left to right, the buttons rename the rung, add a new rung above it, add one below it, mark the leap there (The leap was here), and remove it. A new rung opens ready for its name. You can also use the round buttons on the ladder itself. They appear when you point at the ladder, and they are always there on a tablet. A + on a rung puts a new rung there, and a − between two rungs removes the rung above it. Removing a rung that has notes on it asks first, because the notes go with it. Select a rung's question to reword it, or + Add a question on a rung that has none.
Use this to match the wording your school uses, to make the ladder simpler for a younger class, or to add a rung your class needs. A ladder holds up to 10 rungs. Your changes travel with any link you share, and in a starter they are locked, so every student sees the same ladder.
The dashed arrow joins I adopt beliefs and I select data. It stays when you add rungs, and goes if you rename or remove either of those two.
Share, save and download
- Share offers two kinds of link. A starter for students locks your title, task and any notes already written; students add their own. An exact copy shares the ladder as it is.
- Save keeps a copy on this device under a name you choose. It reads Saved while the screen matches a saved copy. To find it again, open File and select Open a saved diagram. You can rename or delete saved copies there too, and deleting asks first.
- To download the drawing, open File and select Picture (PNG), for slides or Drawing (SVG), to edit or print large.
- Full screen is the button with two arrows in the top-right corner of the drawing. The tool then fills the screen, which suits the board. Press Esc, or select it again, to go back.
- Undo and Redo are the two curved arrows at the top left of the drawing. Undo takes back your last change, and Redo puts it back. A whole drag counts as one change, and so does a word typed in one go. With a keyboard, press Ctrl+Z (⌘Z on a Mac) to undo, and Ctrl+Y (⇧⌘Z) to redo. In a box you are typing in, those keys undo the typing instead.
- To start again, open File and select New blank diagram. It asks first. If you change your mind, select Undo.
Tips
- Use a made-up story first. Practise on a fictional situation like Sam's before students use their own, so nobody has to defend a real judgement in front of the class.
- Fill the foot with the camera test. If a camera could not have recorded it, it does not go on Observable data.
Troubleshooting
I removed something by mistake. Select Undo straight away, as many times as you need. It works back through every change since the page opened, including starting a new one.
Selecting a rung does nothing. The rung may already have 8 notes. If a note is selected, the first tap only closes its toolbar.
My ladder has gone. It is kept in this browser only. Another browser or device will not have it unless you saved it and turned on sync, or restored a backup there.